FieldKit Weather Station Deployment for Beginners

I recently had the opportunity to deploy a FieldKit Weather at my house as part of a wider testing initiative for our hardware. I may have been part of the FieldKit team for a while, but this was the first time I got to work up close and personal on a weather station deployment. As someone who had never set up a weather station before, I recorded the experience in detail, including everything I learned along the way. I then had our instrumentation scientist, Pete Marchetto, review my deployment. You’ll see his commentary along the way in this post.
Fortunately for me, I also started with an amazing team of colleagues with lots of tips. A handful of things were very clear from the beginning:
- Plan ahead–if possible, look at your deployment location and decide how you will install everything before you get started. This may require taking measurements or inspire you to draw a diagram. Whatever you need to do: go in with a plan.
- Be flexible. You may need to adjust things down the line, so an installation that can be taken down or adjusted will make that eventuality easier. As they say in the machining world, “if you can’t make it perfect, at least make it adjustable.”
- Bring more zip ties than you think you will need. Heavy duty, UV-resistant, and big (1 cm wide or wider if possible). These are usually black.
I live in the woods, but we do have a small field in the front yard that has a fenced vegetable garden thanks to the ravenous local deer population. The fence posts of the garden seemed like obvious candidates for my first deployment, attaching the station and instrumentation to one and the solar panel to another. This is also the sunniest place on the property, so that was a bonus for maximizing station power.
I walked outside, did some thinking and took some measurements, then sketched out my plan (not to scale), both from above and straight on. For these measurements, I estimated using a tape measure, but you can also use a piece of string cut to the length of the cable you plan to use to get a sense of how you might route your cables.
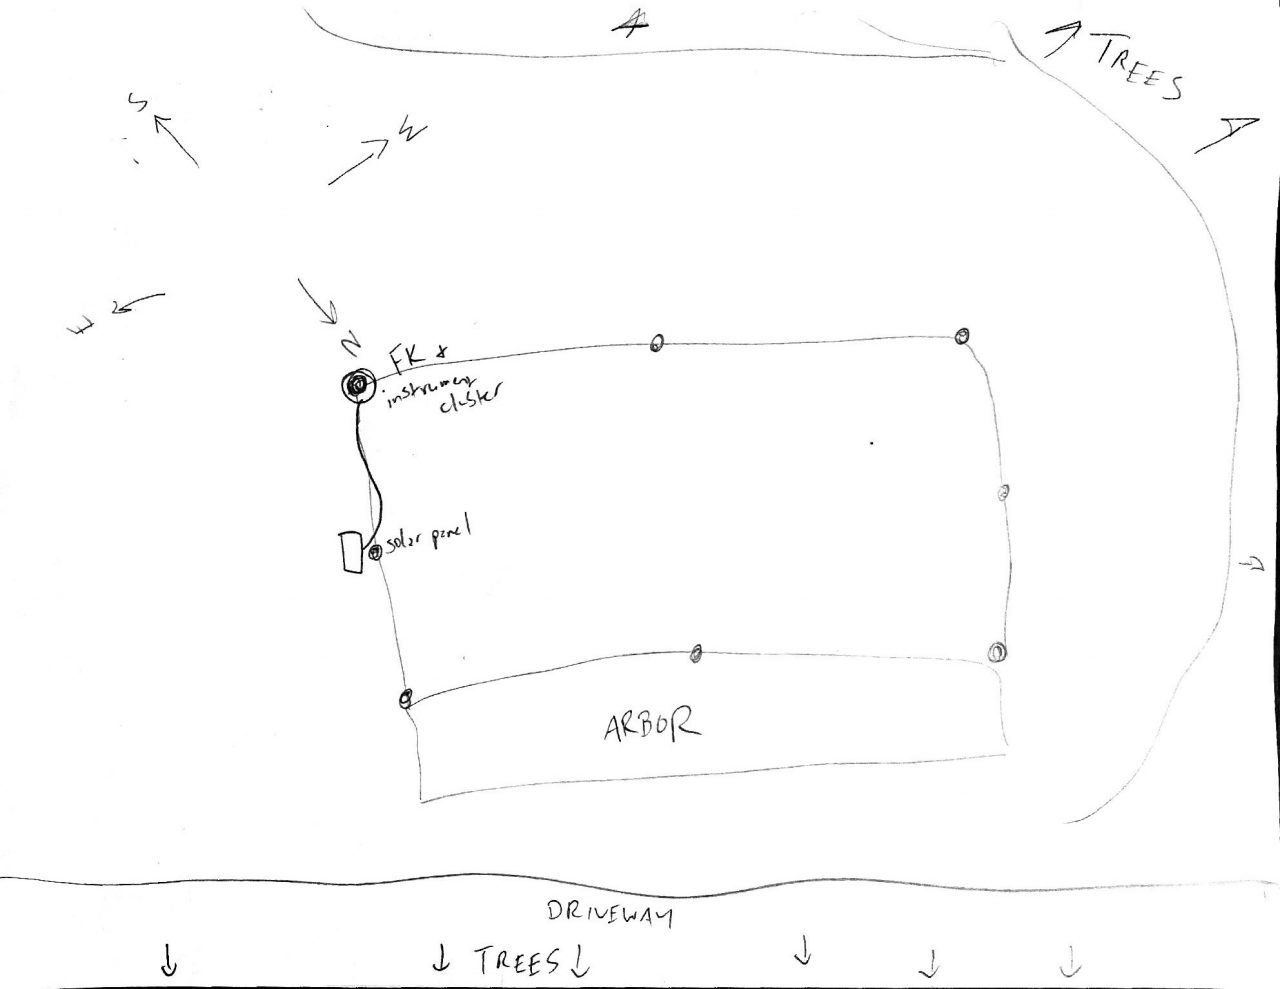
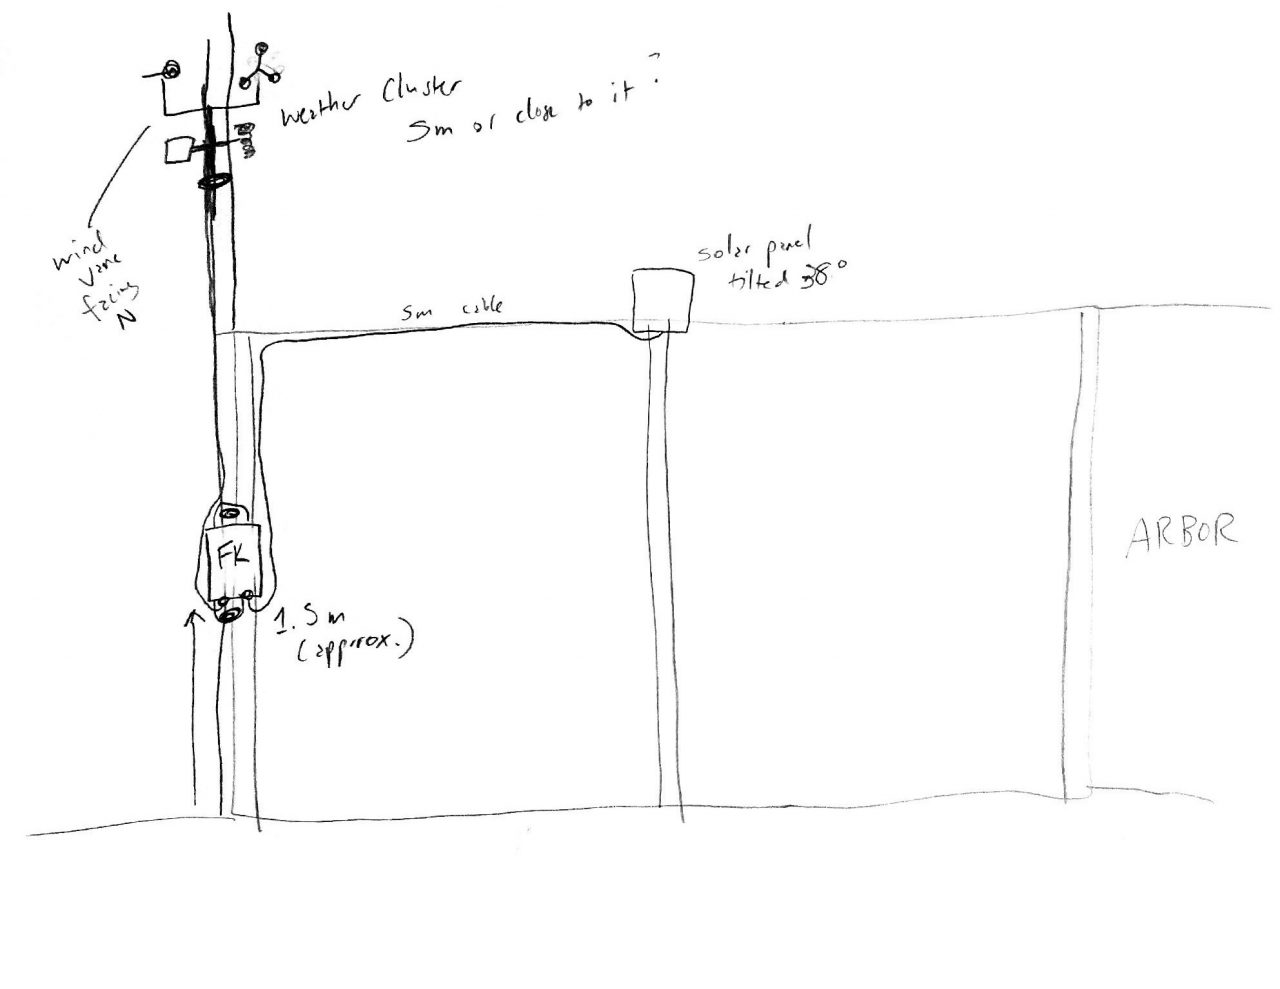
After sketching this out, I realized that this would be much easier as a two-person job. My installation would be sturdier, better, and safer if I had someone helping me. Looking back now, the process was pretty swift and simple with an extra set of hands, so my official addition to the weather deployment advice list I shared earlier is:
4. If you haven’t done this before, assistance from someone else is really, really worth it.
Station assembly was pretty smooth, however, be aware that if you go ahead and run the CAT5 cable for the weather instrumentation and the cable for the solar panel to your station before installation you’ll have heavy and fragile items to manage that are all connected to one another. If you don’t assemble the cable plate fully beforehand, however, that means you’ll need to fiddle with the cable glands in the field. I recommend splitting the difference for first timers: familiarizing yourself with the cable glands before going into the field (i.e. run the cables through first and then remove them) and then finish up in the field.
PETE SAYS: I usually would plug in the CAT5 on the station side and run it to the Stevenson screen, then zip tie it in place afterwards. Similarly, I’d run the cable from the solar panel to the station, then up into the box and connect it. Bend radius and strain relief can really come back to bite you on this, so make certain that you have nice, wide, swooping bends, and enough cable inside the station enclosure that if it gets pulled on from the outside it doesn’t immediately rip the connectors off the board.
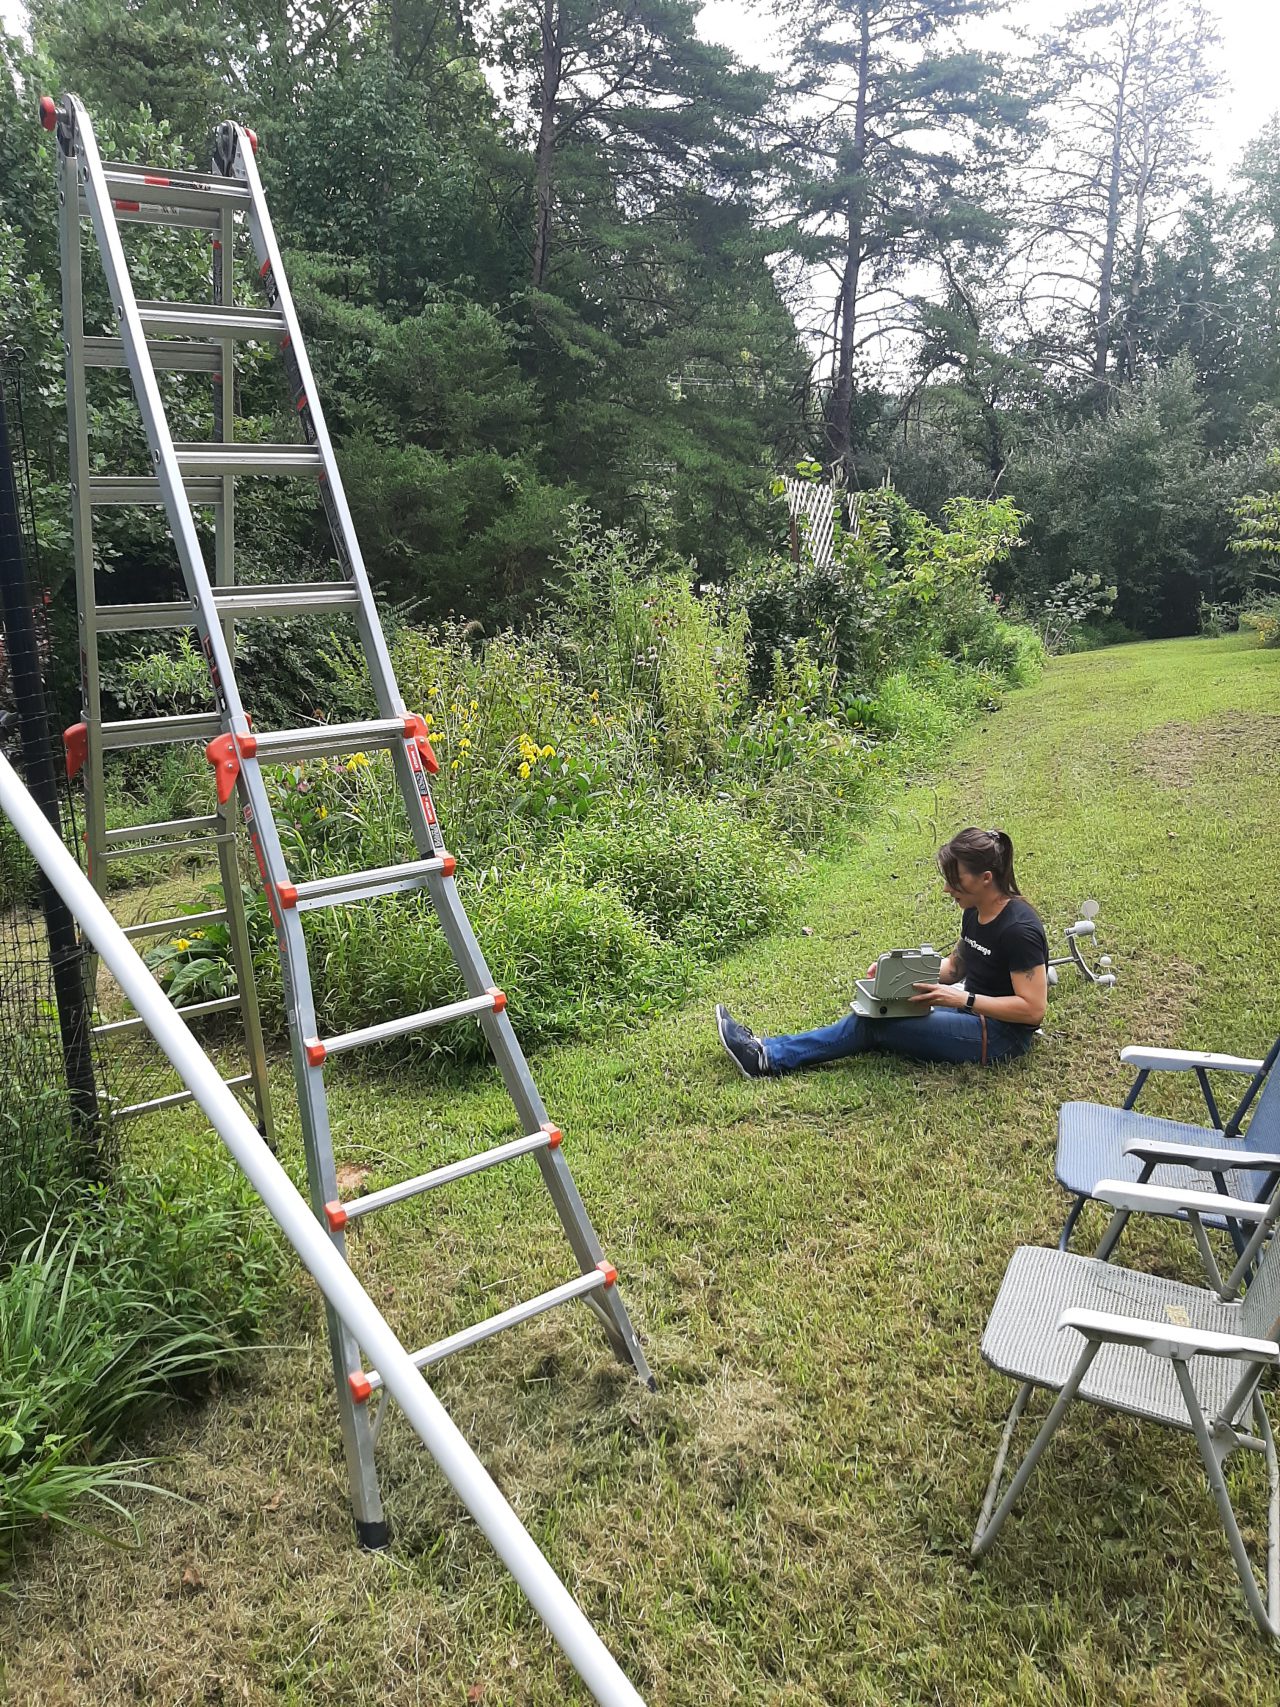
Speaking of being in the field, if it’s possible to plan your deployment for pleasant weather, that also makes a big difference. Installing instrumentation at midday during an intense heat wave in August in the Northern hemisphere was perhaps not my best choice. I would recommend avoiding deployment during rain or snow if at all possible, though the station itself is weatherproof (just watch out for the hardware inside!)
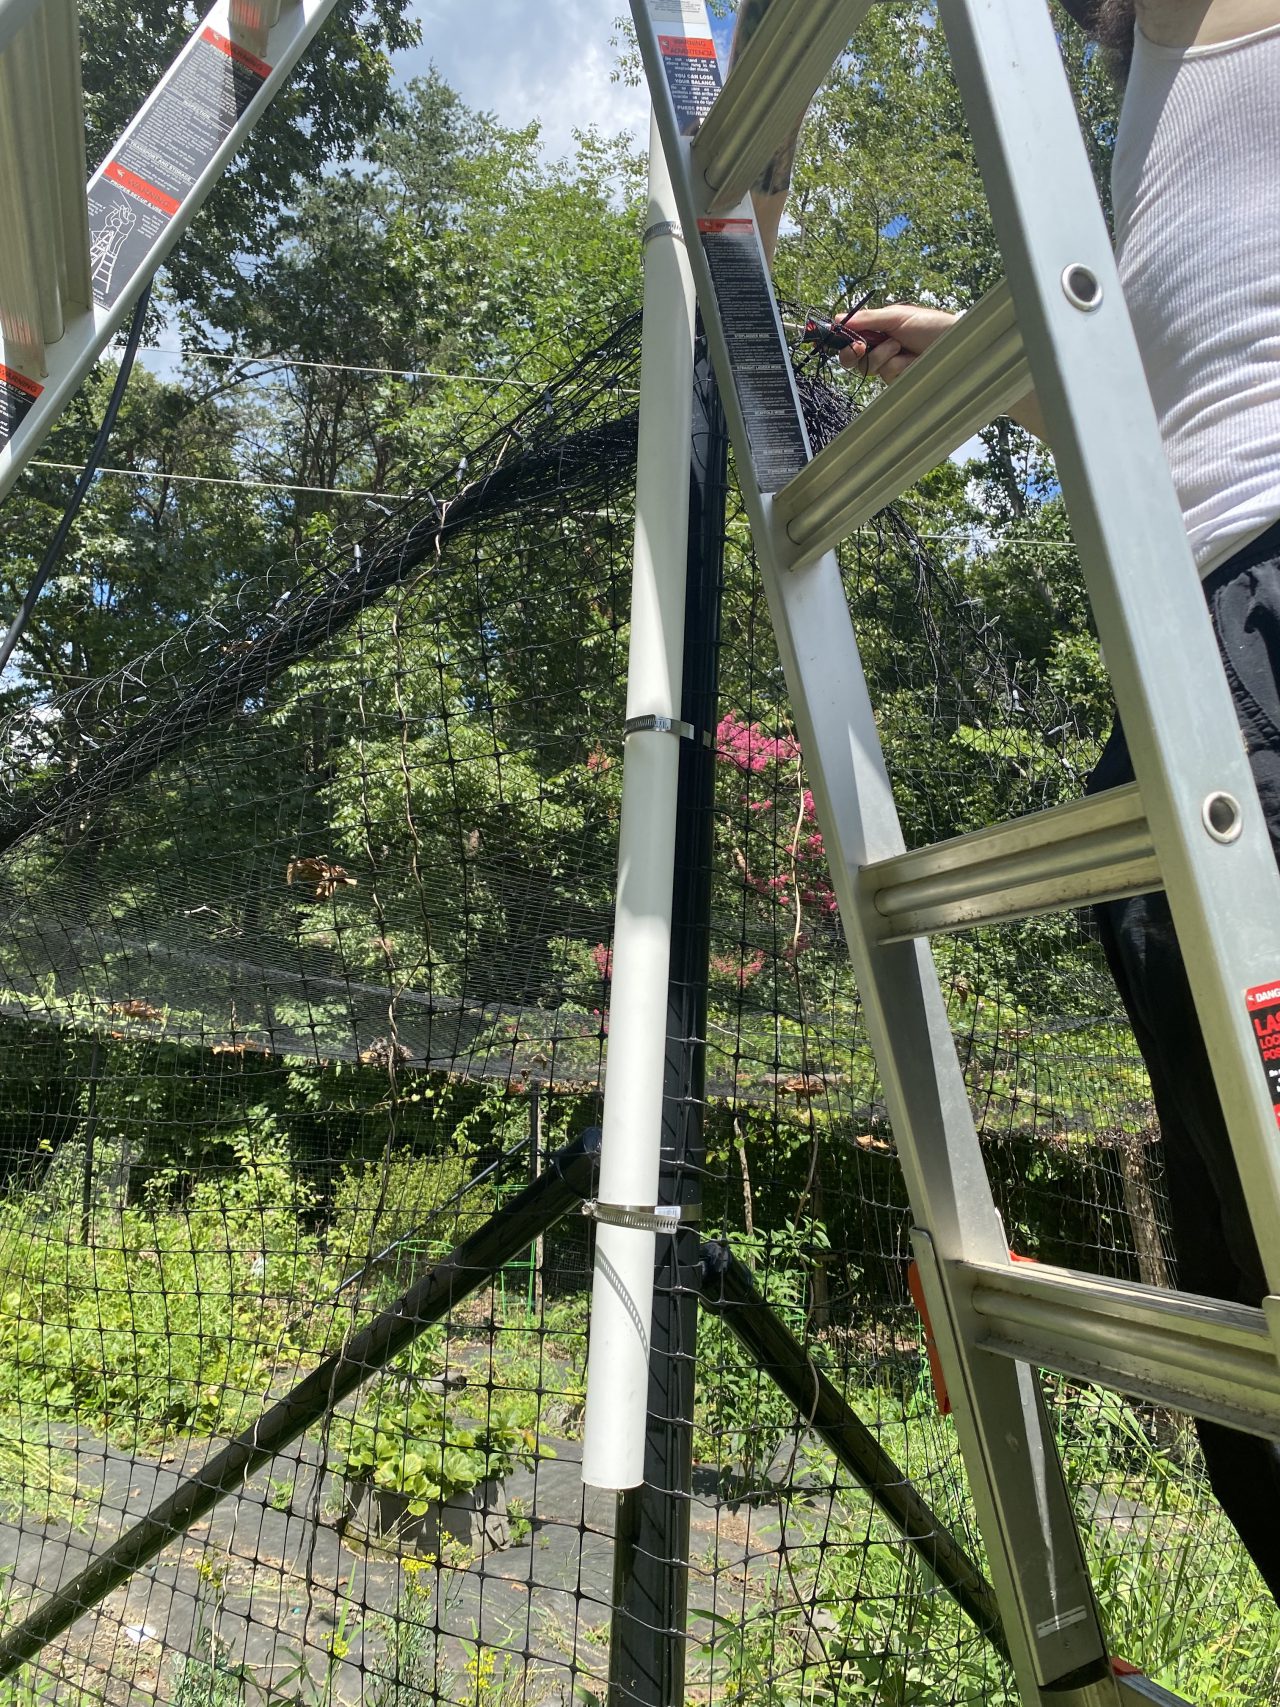
Our documentation recommends putting the wind vane and anemometer five meters above the ground to avoid boundary effects. Interestingly enough, I learned during this process that not 100% of our deployments meet this criteria, so don’t worry if this is not possible in your situation. This was the most difficult part of the deployment for me, as 5 meters is quite high, and despite being a rock climber in my free time, there’s a big difference between a rock wall and a fence post. The fence posts in my yard are only about 2.5 meters high. In the interests of getting my test station up and running, I decided to go to my local home improvement warehouse and buy a 10 foot length of 2″ schedule 40 PVC pipe (10 feet is about 3 meters) and some large hose clamps that would easily fit around both the fence post and the PVC pipe.
PETE SAYS: If your PVC is wide enough, you can also feed cables through it. Just make certain to leave the end open to allow for rain to drip through.
I used the two small hose clamps that come with the FieldKit Weather Pack to secure the weather instrumentation mounting pole to the PVC pipe, making sure that everything was very secure in case of wind. I also secured the cables on the instrumentation with a zip tie.
PETE SAYS: If possible, avoid cut hands by using a nut driver to tighten these clamps rather than just a flat blade screwdriver. Trust me, it’s worth it.
LINDSAY SAYS: I wish I knew this ahead of time. My hands were not happy by the end of this!
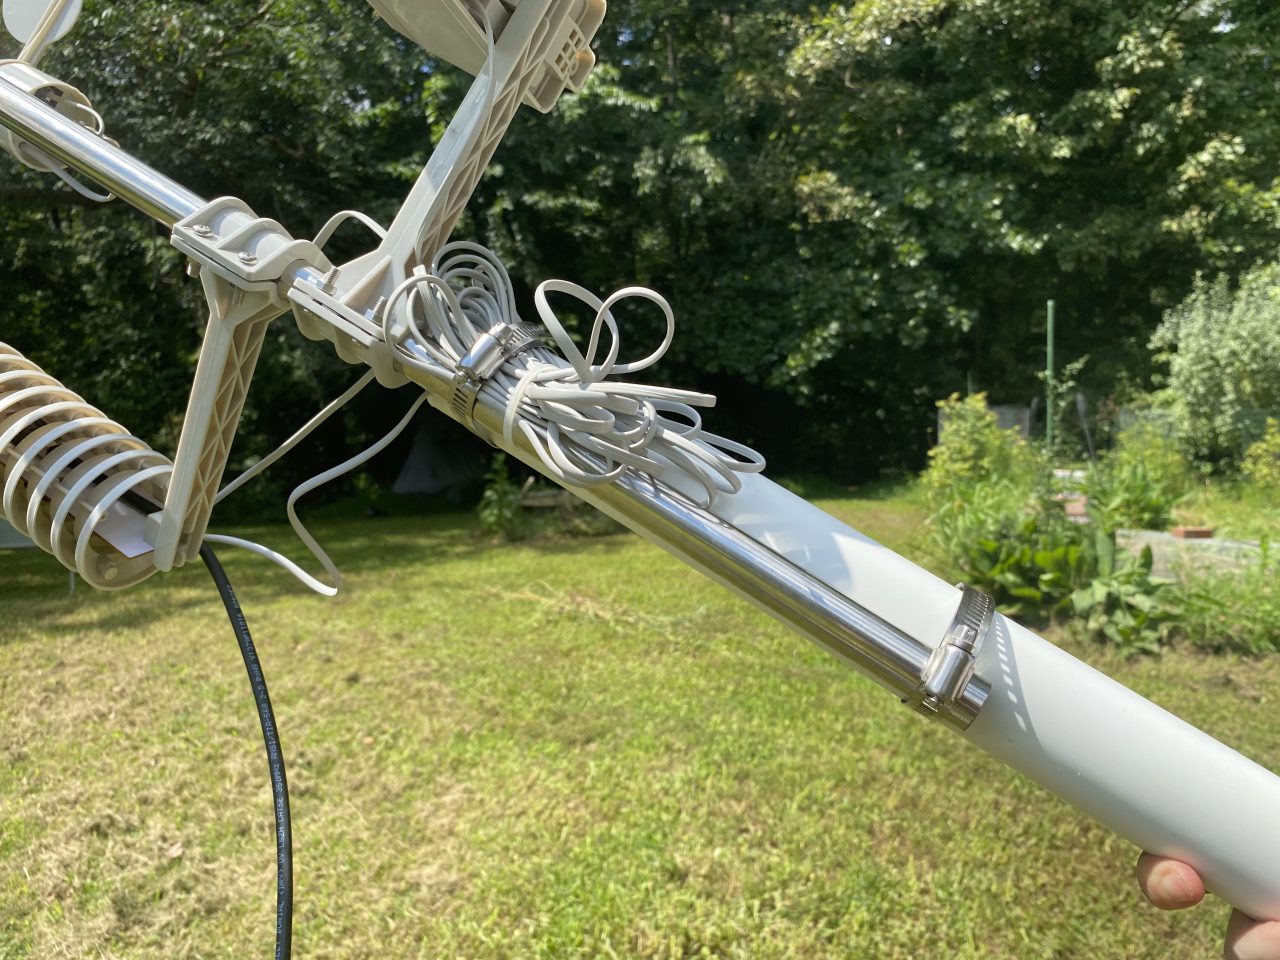
PETE SAYS: Please don’t clamp the cables with the hose clamps, as they are sharp and will result in cuts through the insulation of the cables as they move in the wind over time. A better option is to zip tie the cable bundle to the hose clamps when possible, as this allows for the bundle to move without being abraded by the stainless steel of the clamps.
LINDSAY SAYS: Thanks, Pete! I’ll make this change as soon as I can.
My deployment partner and I then used the additional three large hose clamps purchased from the home improvement warehouse to secure the PVC to the fence post at the bottom of the PVC, top of the fence post, and in between those two locations. We also secured these down as much as possible. Ideally, we could have used a 5 m long PVC pipe to add extra security but I was unable to obtain one locally with any swiftness. I may make this change in the future. Note that this process required a ladder to attach the highest hose clamp.
PETE SAYS: Under constant UV and weathering exposure, schedule 40 PVC can brittle and begin to crack, especially if it’s under a shear load, like wind. I’d recommend using gray electrical conduit which is hardened for outdoor use. I’d also recommend the use of guy wires, usually 1/8″ or 3/16″ steel cable, to dampen wind-induced oscillations and stabilize the mast by holding it in tension with a few points on the ground.
LINDSAY SAYS: Thanks for the tip; I’ll work on sourcing electrical conduit for my deployment revision. The guy wires will be tough to set up due to how frequently the space is traversed by people, including small children, and things like lawnmowers. I’ll have to think hard on how to do this safely and effectively with the other fence posts.
When installing the instruments, the “N” marker on the wind vane must point north, but getting that right when your instrumentation is 5m off the ground is tough! I decided to line up the N on the wind vane with the side of the rain gauge. That way, if the rain gauge was pointing the correct way, I would know that the wind vane was as well. Additionally, it’s important to make sure that everything is plumb, also difficult when the instrumentation is 5 m high! We held a bubble level to the side of the PVC as high as possible and saw that it was plumb and called it a day. If this hadn’t worked, I suspect we would have added shims to the hose clamps.
PETE SAYS: Did you use a magnetic compass or something else for alignment? If a magnetic compass, did you account for magnetic declination? According to what I’m seeing, your location is at almost 11°, which is darn close to half a division of the wind vane (22.5°/div.). Here’s a tool for helping with this.
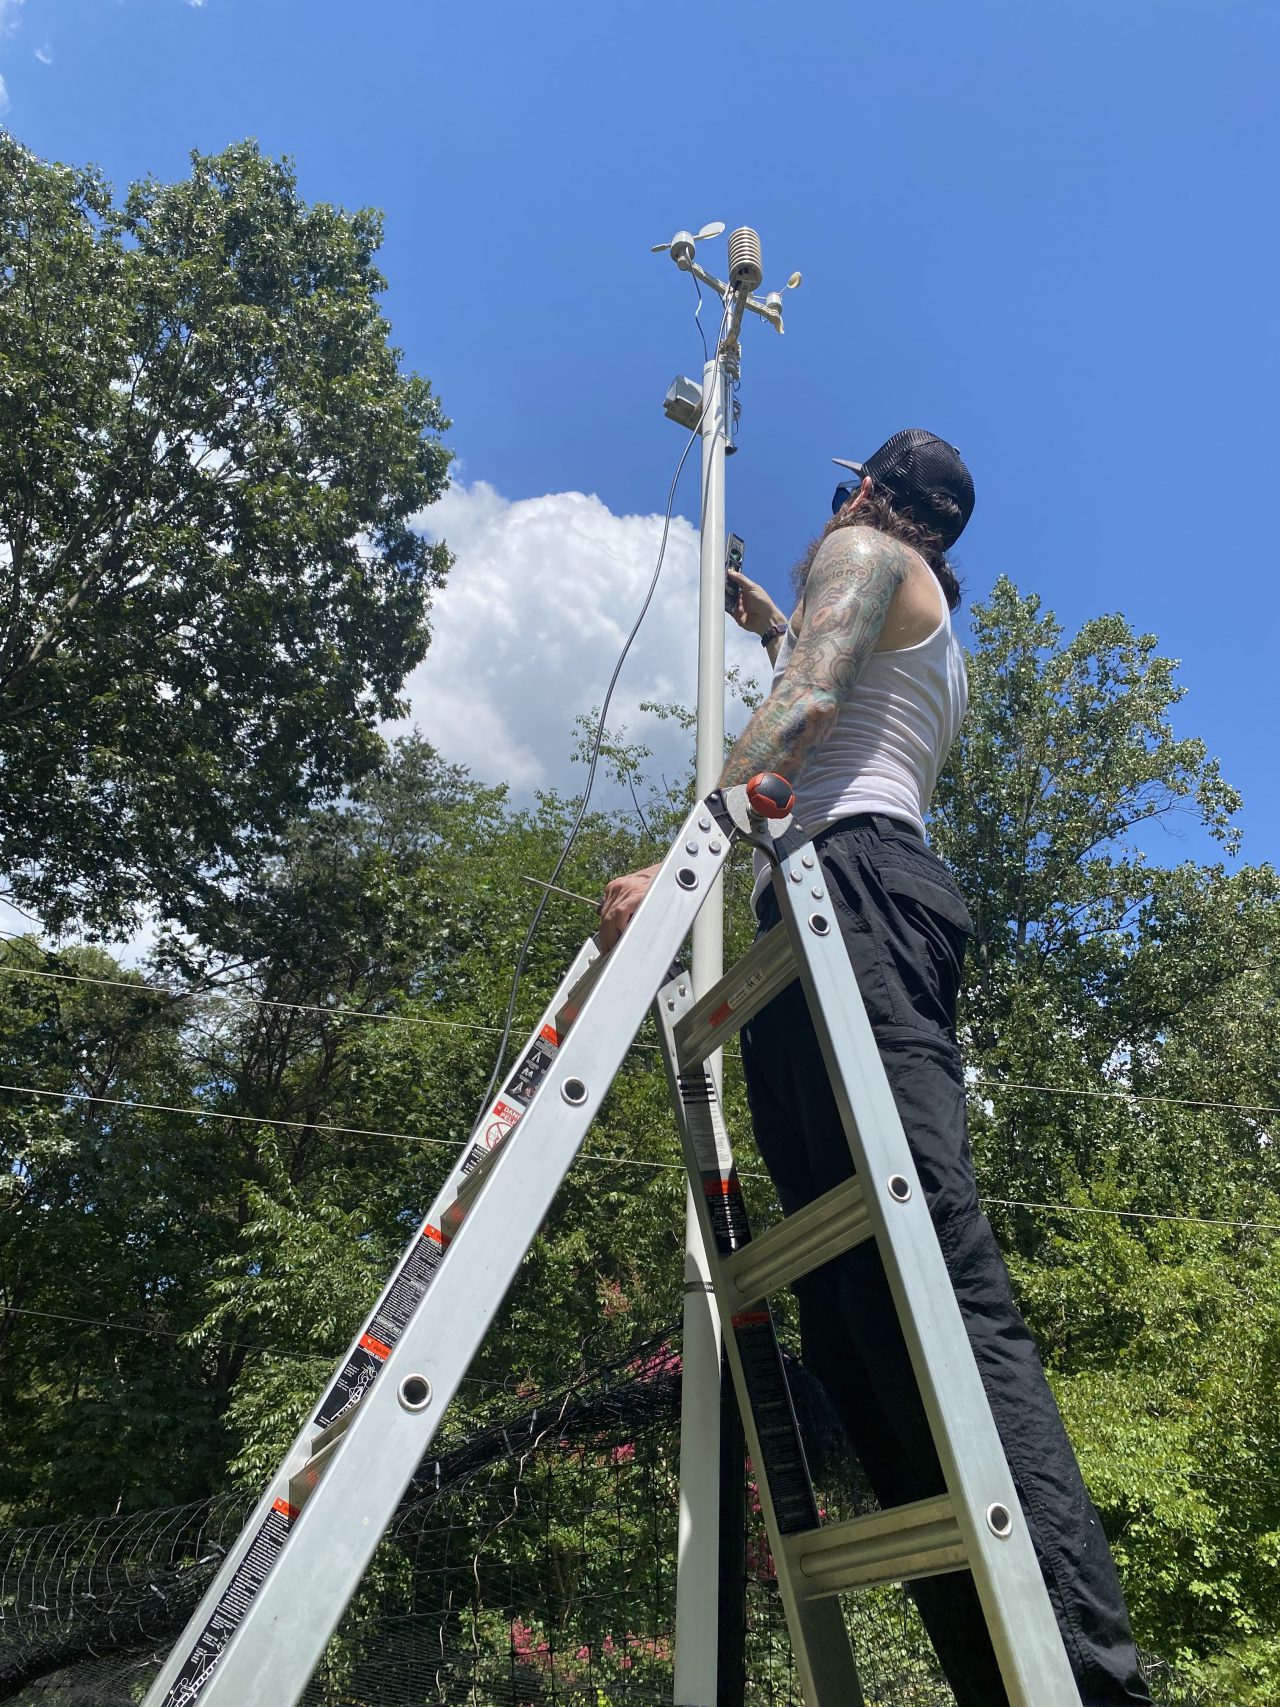
PETE SAYS: Good job checking plumb on the higher limb of the lever arm! You always want to be above the center of gravity, and as close to the top as you can so that you get as much angular deviation out as possible. A post/pipe level is useful for this, like those described here.
With the weather instrumentation installed, it was time to secure the FieldKit station itself. Fortunately, the case has mounting holes at the top and bottom that make this a breeze using a couple of heavy-duty zip ties to secure the case to the fence post and PVC at eye level. I also took a moment to double-check that the battery was secure in the case and that the cable glands were tight around the cable for the weather sensors and the solar cable. Finally, I made sure to loop the cables down towards the ground before putting them into the enclosure through the cable glands. This is called a drip loop and will prevent water from entering the enclosure by using gravity to counter its flow.
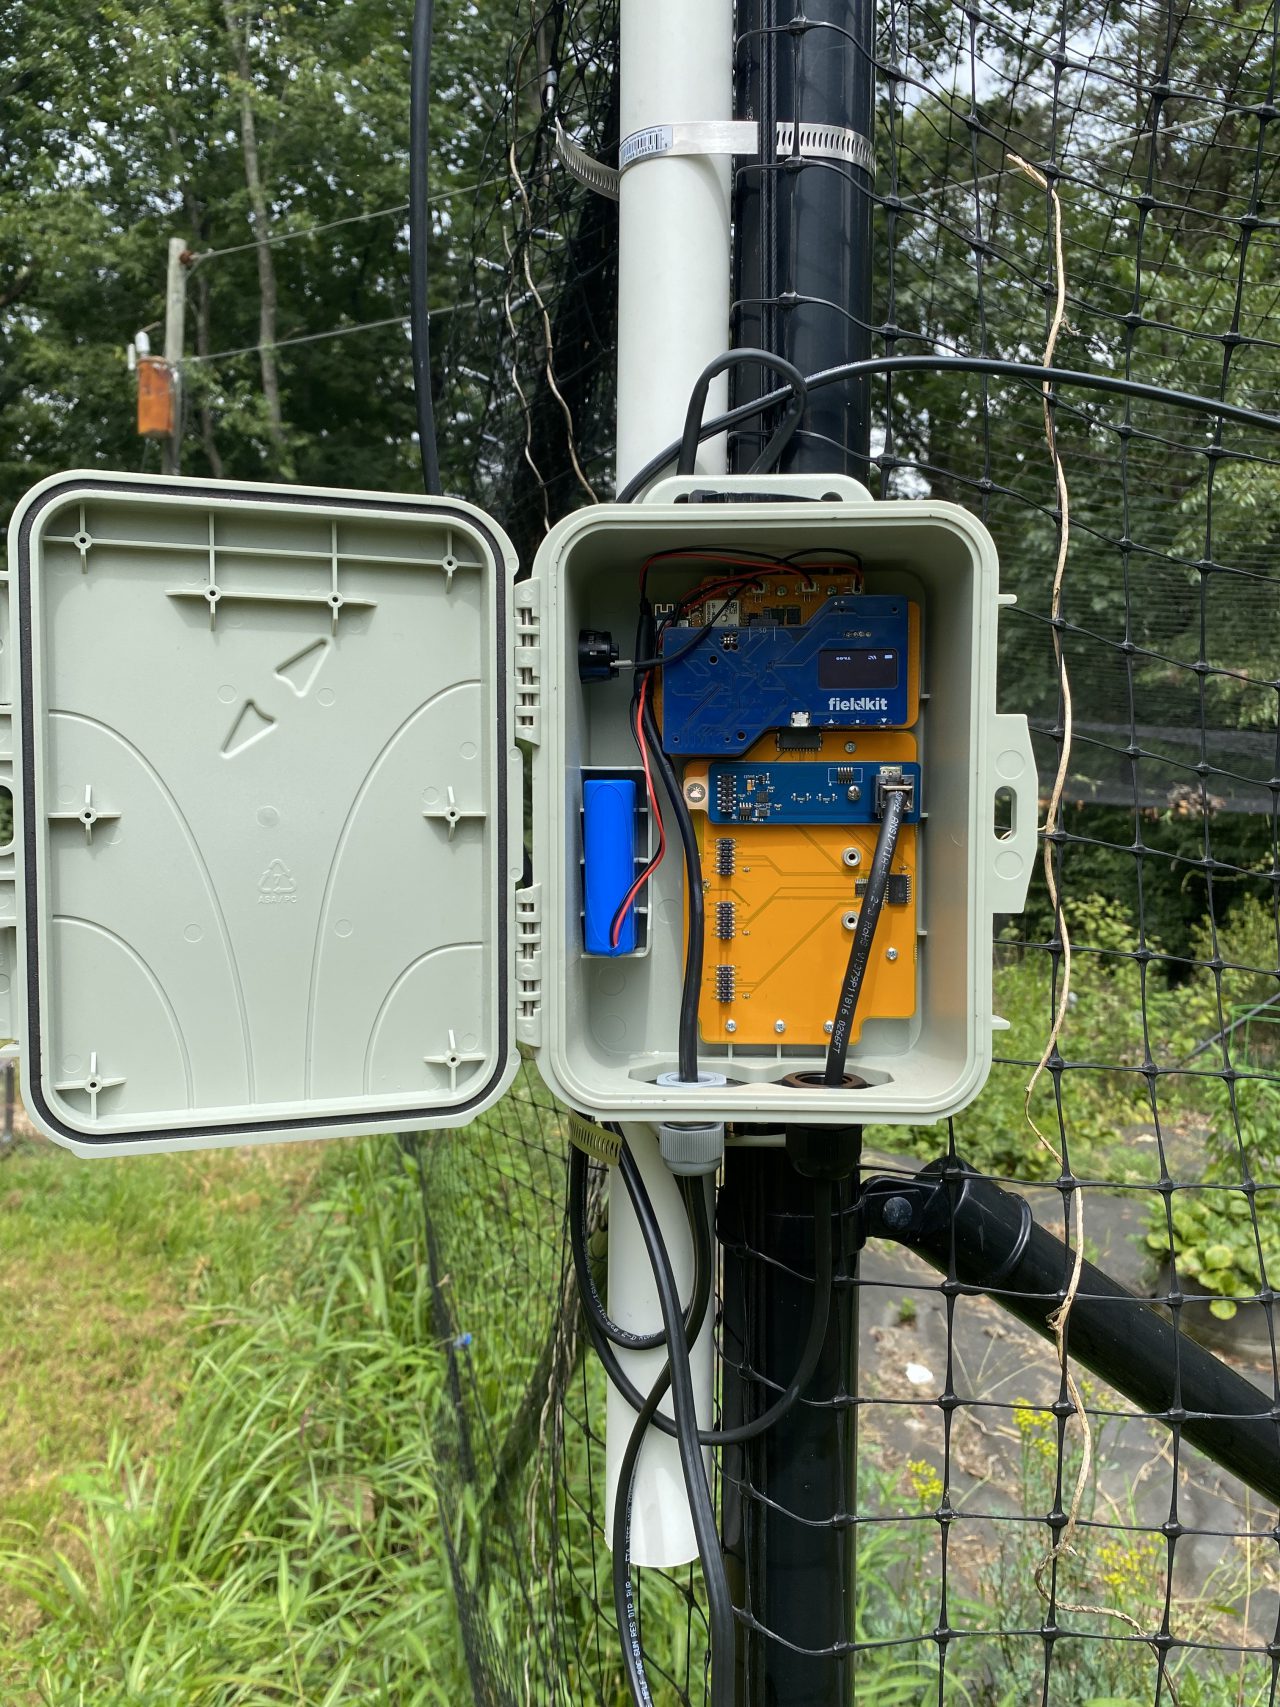
I connected to the station via the FieldKit app to make sure that nothing had come loose during installation and we were ready to install the solar panel!
My location is at 38ºN, so that means ideally my solar panel would be installed facing south at a 38º angle. I realized I could get pretty close to that ideal with just a couple of heavy-duty zip ties on a different fence post from the main station and instrumentation. (At this point, it was very hot and we were very tired). Fortunately, getting data on your solar panel installation is pretty easy–if your station’s power doesn’t top up, you need to adjust your installation. After a few days, I’m happy with the battery levels so this works for the time being. I can always remount it later on if things change.
PETE SAYS: For the real skinny on optimizing your solar panel tilt, check out this resource.
LINDSAY SAYS: Thanks, Pete! This could definitely be better. I’ll work on constructing something with a bit more finesse and adjust the angle according to season.
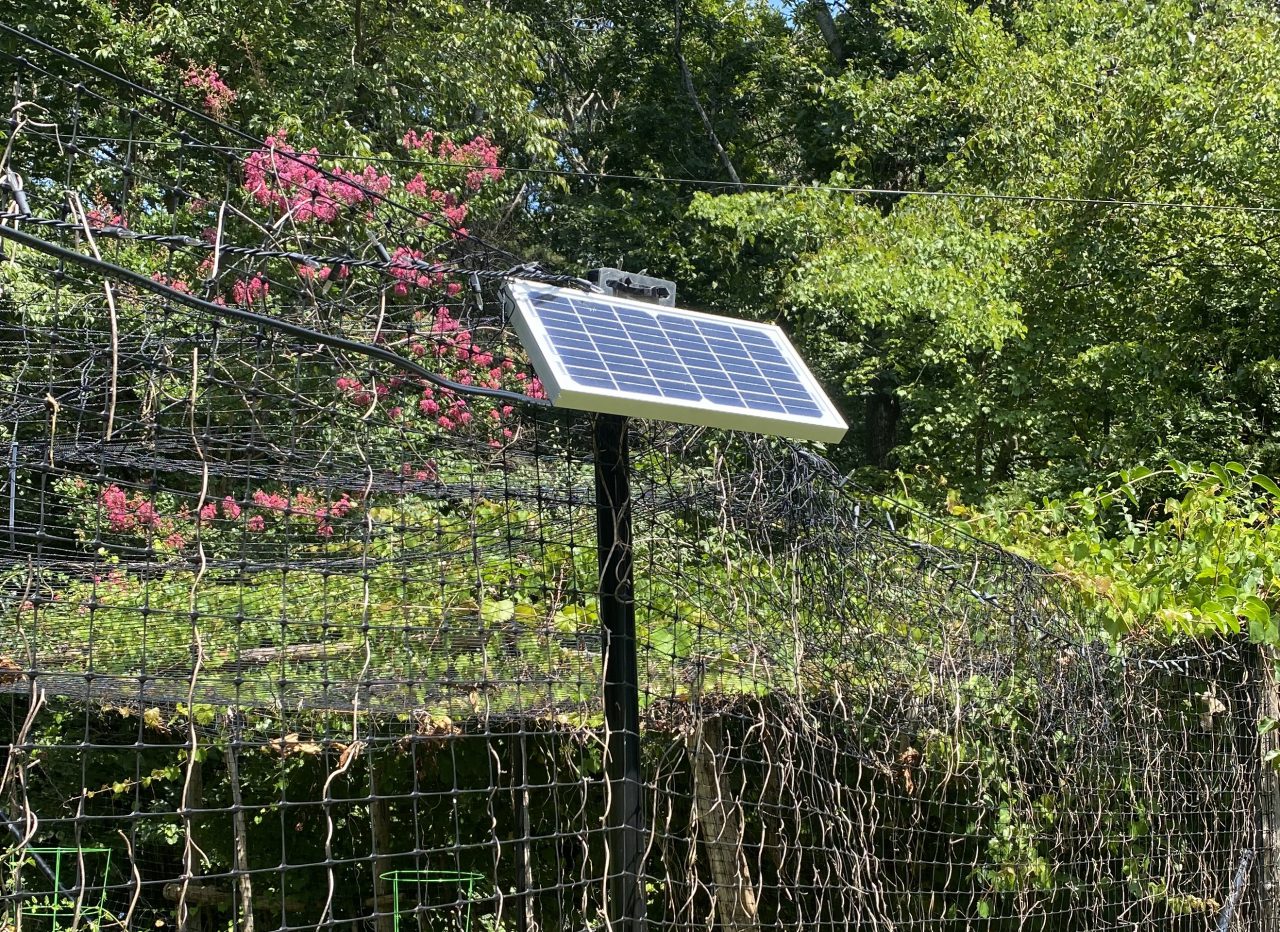
Cables are always a point of failure in any deployment—Pete likes to share the stories of cows using them as a kind of dental floss—so I plan to go back and cover my cables with wireloom where I can to prevent damage. Mixing petroleum jelly and cayenne pepper and applying it to the cables is another option to prevent animal chewing that is a little more cost-effective. If this location were not so readily accessible, I would have included this in my initial deployment process so I didn’t have to go back.
So far, the data looks good from my station—I’m excited to see how things go and use what I learn from this deployment to continue assisting our customers and partners. If you need help deploying your FieldKit station, our team and user community would be thrilled to help you. Drop your question in the forum here and we’ll work with you to figure out the best solution for your unique situation.