FieldKit Goes to Brooklyn: Tips, Tricks, and Lessons Learned for FieldKit Deployment

At FieldKit, we talk a lot about how to bridge gaps:
- the gap in tool access between research scientists and the “everyone” we think could benefit from FieldKit.
- the gap in cost between most environmental monitoring systems and what folks who aren’t well-funded and in the global North can afford.
- the gap in user experience between what it’s like to use the equipment already out there and the accessible, open technology that we want to make available to the world.
Here’s another gap: deploying a FieldKit station in the field can be challenging. Really challenging. How you do it is dependent on what you’re trying to measure and, more importantly, where you’re trying to measure. Stations and their solar panels have to be securely mounted, cables have to be managed, and everything needs to be put in the environment in a way that minimizes potential interference or damage and maximizes the accuracy of readings. This is complicated, and, unfortunately, we’ve found it to be a barrier to entry for those who are getting out there into the field with their first station.
With this in mind, when a few members of our team had the opportunity to assist the Brooklyn Bridge Park Conservancy in deploying two stations at ONE°15 Brooklyn Marina, we jumped at the chance to walk through the steps with a partner and document the process. We’ll outline the deployment of a FieldKit Water station and a FieldKit Distance station in two upcoming blog posts with plenty of images and video, showing the thought process that goes into a station installation in the field and giving a step-by-step explanation of these installations.
The experience also provided the opportunity to test our own best practices and compile some more general tips for deployment in the field—as well as to share when we didn’t follow our own advice and how things went sideways. Below is a collection of advice about installing FieldKit stations, from site selection to walking away at the end of the process.
#1: Visit the site ahead of time to plan your deployment and select your exact installation location.
Often, you will have a general sense of where you will deploy—a stream, a meadow, a dock on the East River—but narrowing down where exactly on that site you will install your station requires some thought. If you are deploying a station in a new location, doing a site visit before you are in the field and actually installing things will be immensely helpful for deciding where and how to set things up and what you need to bring to do so. Fortunately, our Creative Director and Co-founder Jer Thorp lives right by the park and knows the team at the Brooklyn Bridge Park Conservancy, so he was able to do a site visit and gather photos for our team to use in planning and purchasing. When doing a site visit, take lots of pictures and measurements—you never know what you might need.
A site visit may not always be possible, especially if you’re deploying in a remote location. If you have a contact in the area where you’re deploying, see if they can go and gather information and images for you. Planning your installation will save you time and materials.
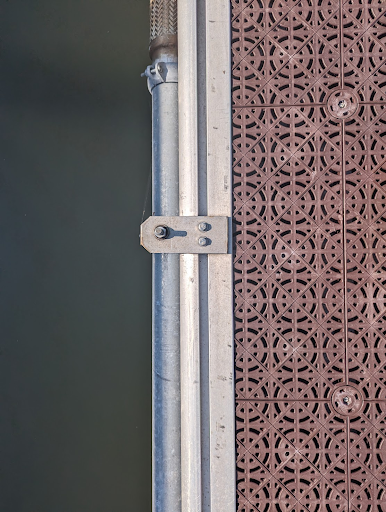
The Water station was to be installed within the marina along a dock with a surface shown below, with the probes dangling into the water from there. We planned to install it on the side of the dock with less boat traffic to prevent possible interference.
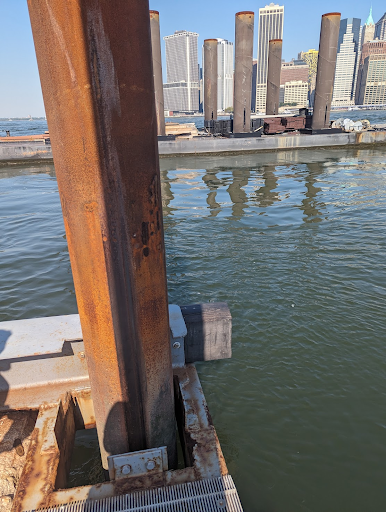
We also knew that we were installing the distance station on a piling at the end of a different dock in the marina—using the piling allows us to project the ultrasonic rangefinder that does the distance measurement out into the water with little possibility of interference.
#2: Sketch out your plan and gather the things you will need ahead of time.
After Jer shared information and images of the site with the rest of the deployment team, we used this to develop a plan. Our Research Engineer and Instrumentation Scientist Pete Marchetto used what was shared to draw up images of the mounting he wanted to build and create a shopping list for the things to bring to the site. You don’t want to have to do a hardware store run in the middle of a deployment (if that’s even an option for you)!
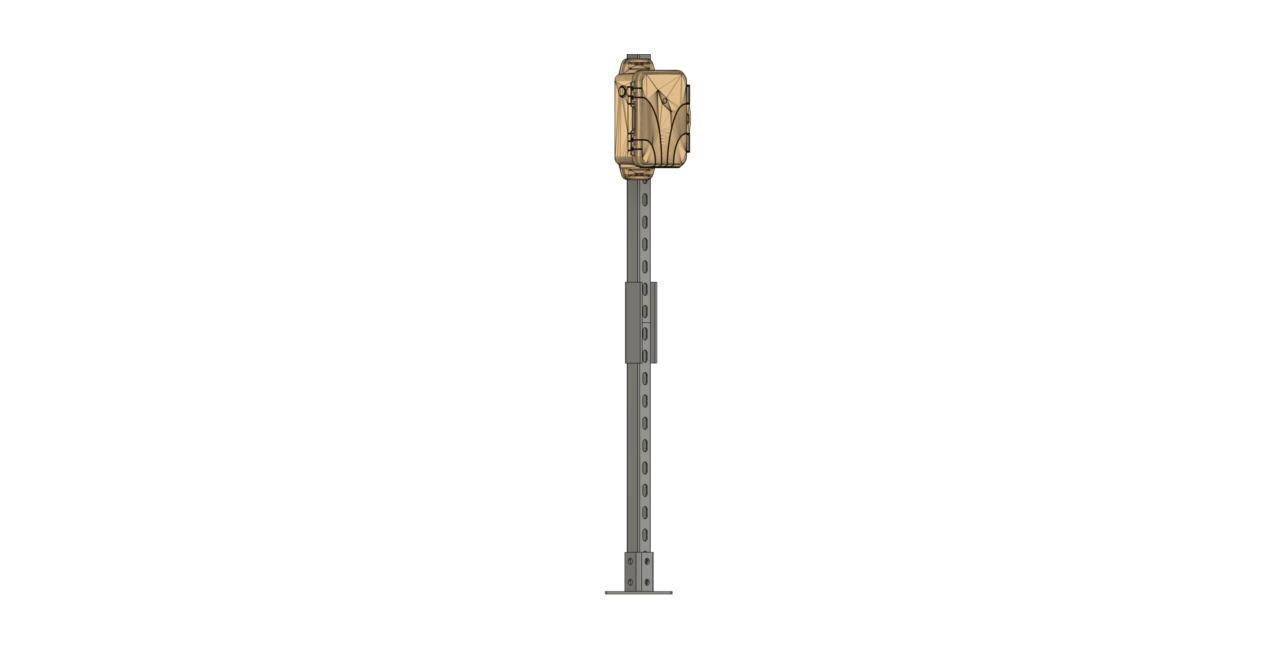
For the FieldKit Water station, we planned to mount it on a structure built of two 2’ sections of strut channel with a mounting plate at the bottom. This mounting plate could be secured to the dock while keeping the station itself readily accessible. We ended up making some changes to this installation on site to accommodate the solar panel, which we’ll discuss in the blog post covering it in more detail.
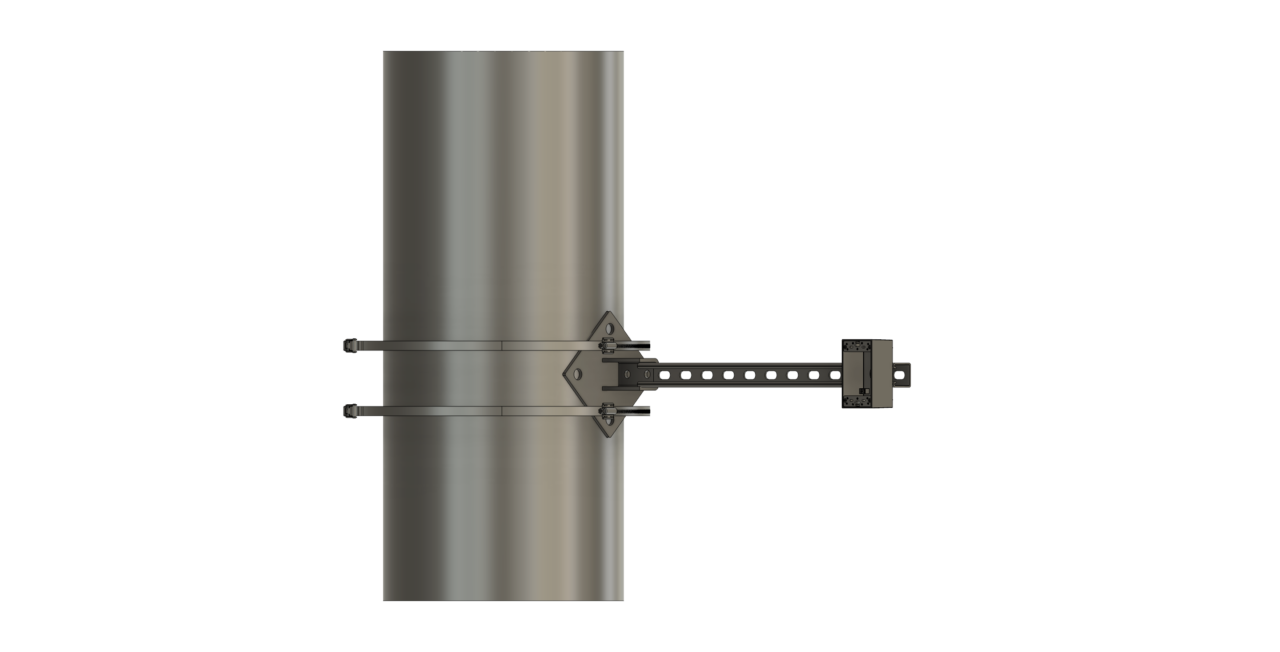
For the distance station, we had to suspend it above the water, so we planned to use weather-resistant band clamps to attach the mounting plate of another strut channel mount, with the ultrasonic rangefinder at the end suspended over the water.
Keep in mind that your mock-ups don’t need to be as fancy as the ones we shared above; you can do just as well with a pencil and paper, as shown in this blog post outlining a FieldKit Weather deployment.
#3: Keep your options open and stay flexible. Bring extra equipment, have a backup plan, and double-check what you bring.
Our first mishap occurred when we realized that the Brooklyn-based hardware store we were planning to use to deliver some of the installation materials to the site was out of certain necessary materials. Pete ended up going to his local home improvement megacenter and then driving the items into the city. We brought plenty of hardware so that we would have options based on what we encountered.
Click here to download the deployment kit list for a strut-based deployment (PDF). Did we use every single thing listed? No. But was it good to have on hand? Yes.
Note that a strut-based deployment was just what we decided to use here—you can ultimately build a mounting solution with whatever works for the environment in which you’re deploying. We always love to see how people have installed FieldKits and encourage you to share your photos with us and the wider community.
Even with everything laid out, we ended up forgetting a few things. As we’ve said plenty of times, bringing lots of UV-resistant zip ties is helpful for cable management, but we managed to forget them. Fortunately, Jer would be able to visit and do some zip-tying later.
#4: Give yourself plenty of time.
Even if you’re an expert, you should always be prepared for things to take longer than expected. We began at 2 PM but as time went on it became clear that daylight was running out. This, combined with rainstorms and some technical issues (see item #7) meant that we were not able to do as much as we wanted to. In retrospect, starting a two-station deployment in the afternoon was not a great idea.
Our recommendation: budget twice as much time as you think you need. If things go perfectly, you’ll be able to walk away with some extra time in your day. If you run into roadbumps, you won’t have to rush.
#5: Assemble your station ahead of time if possible.
Due to shipping issues, the distance station didn’t arrive until right as we headed out to the pier. This means that we had to assemble the station (including all of those tiny screws!) on a wobbly pier with a porous surface. Jer is a champ, however, and managed to put the station together without losing a single screw.
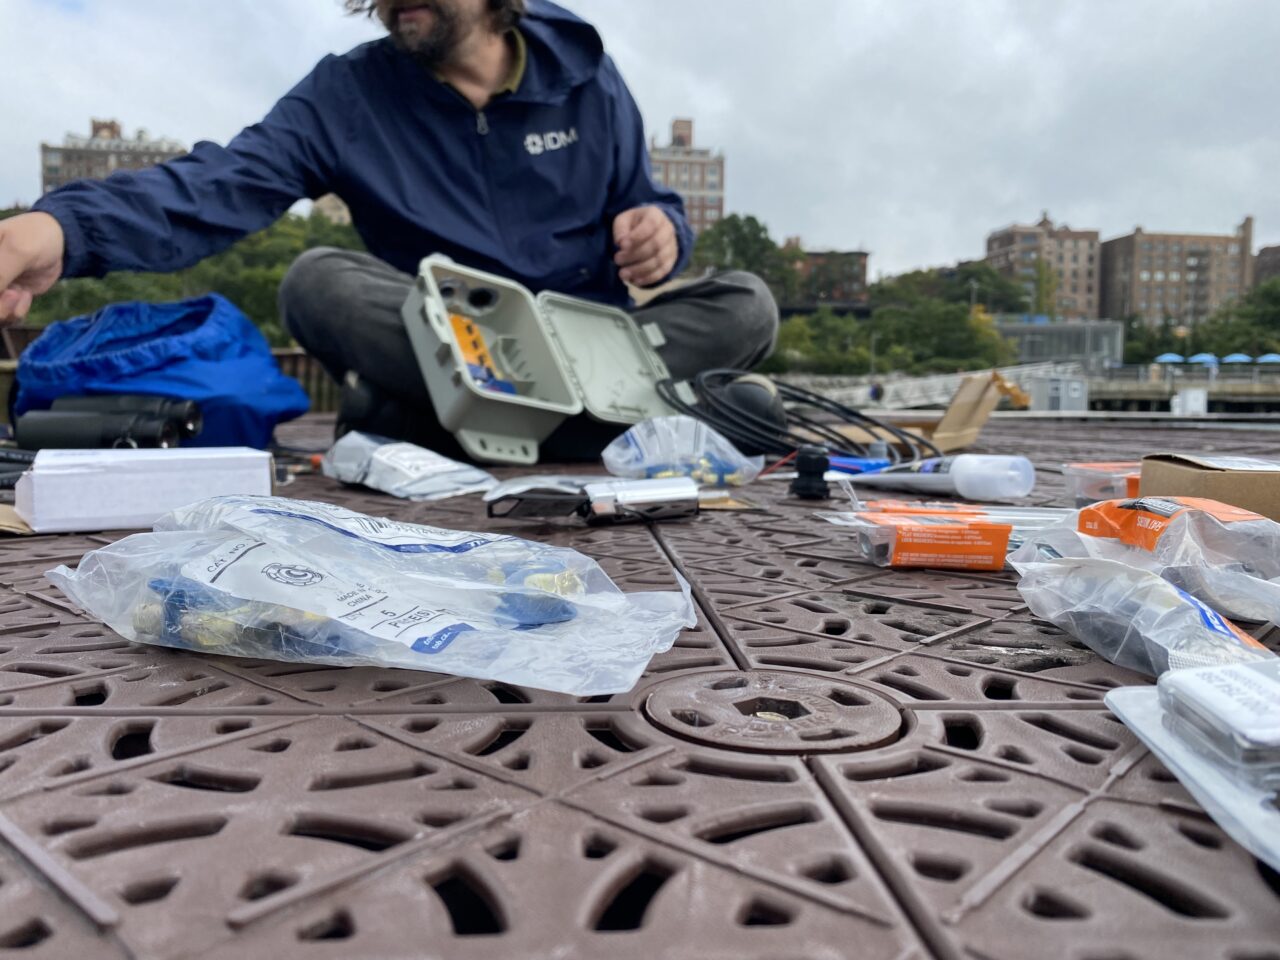
We don’t recommend this if you can avoid it. Do as much assembly of your station as you can ahead of time, in a well-lit and easy to control environment.
#6: Charge all batteries before going into the field.
This, more than anything else, was our downfall. With one station freshly shipped in and the other one having been held by the Brooklyn Bridge Park Conservancy, neither station had a fully-charged battery. We know this is critical, yet we didn’t realize this was the case until we were there on the dock getting set up. The problem: in order to calibrate and/or finish station deployment, it needs a certain amount of power. Therefore, we could complete installation but not a full deployment and would have to come back with fully charged batteries to get things finalized.
Do not skip this step.
Do not skip this step.
Do not skip this step.
#7: Many hands make light work. Having help from other people makes a big difference.
If you are new to deploying technology in the field, or even if you aren’t, it’s helpful to have extra hands and heads around to assist with the process. We were fortunate to have three FieldKit team members, one FieldKit spouse (thanks Dr. K. Marchetto!), and help from the inimitable Marley Kern from the Brooklyn Bridge Park Conservancy team. Between the five of us, we were able to hold things steady, adjust mountings, run from one deployment location to another, document the process, and keep things moving.
For example, when installing the distance station on the piling, one person had to hold the mounting in place while the other had to rapidly tighten the large band clamps to fasten the mounting to the piling. This would have been nearly impossible with only one person.
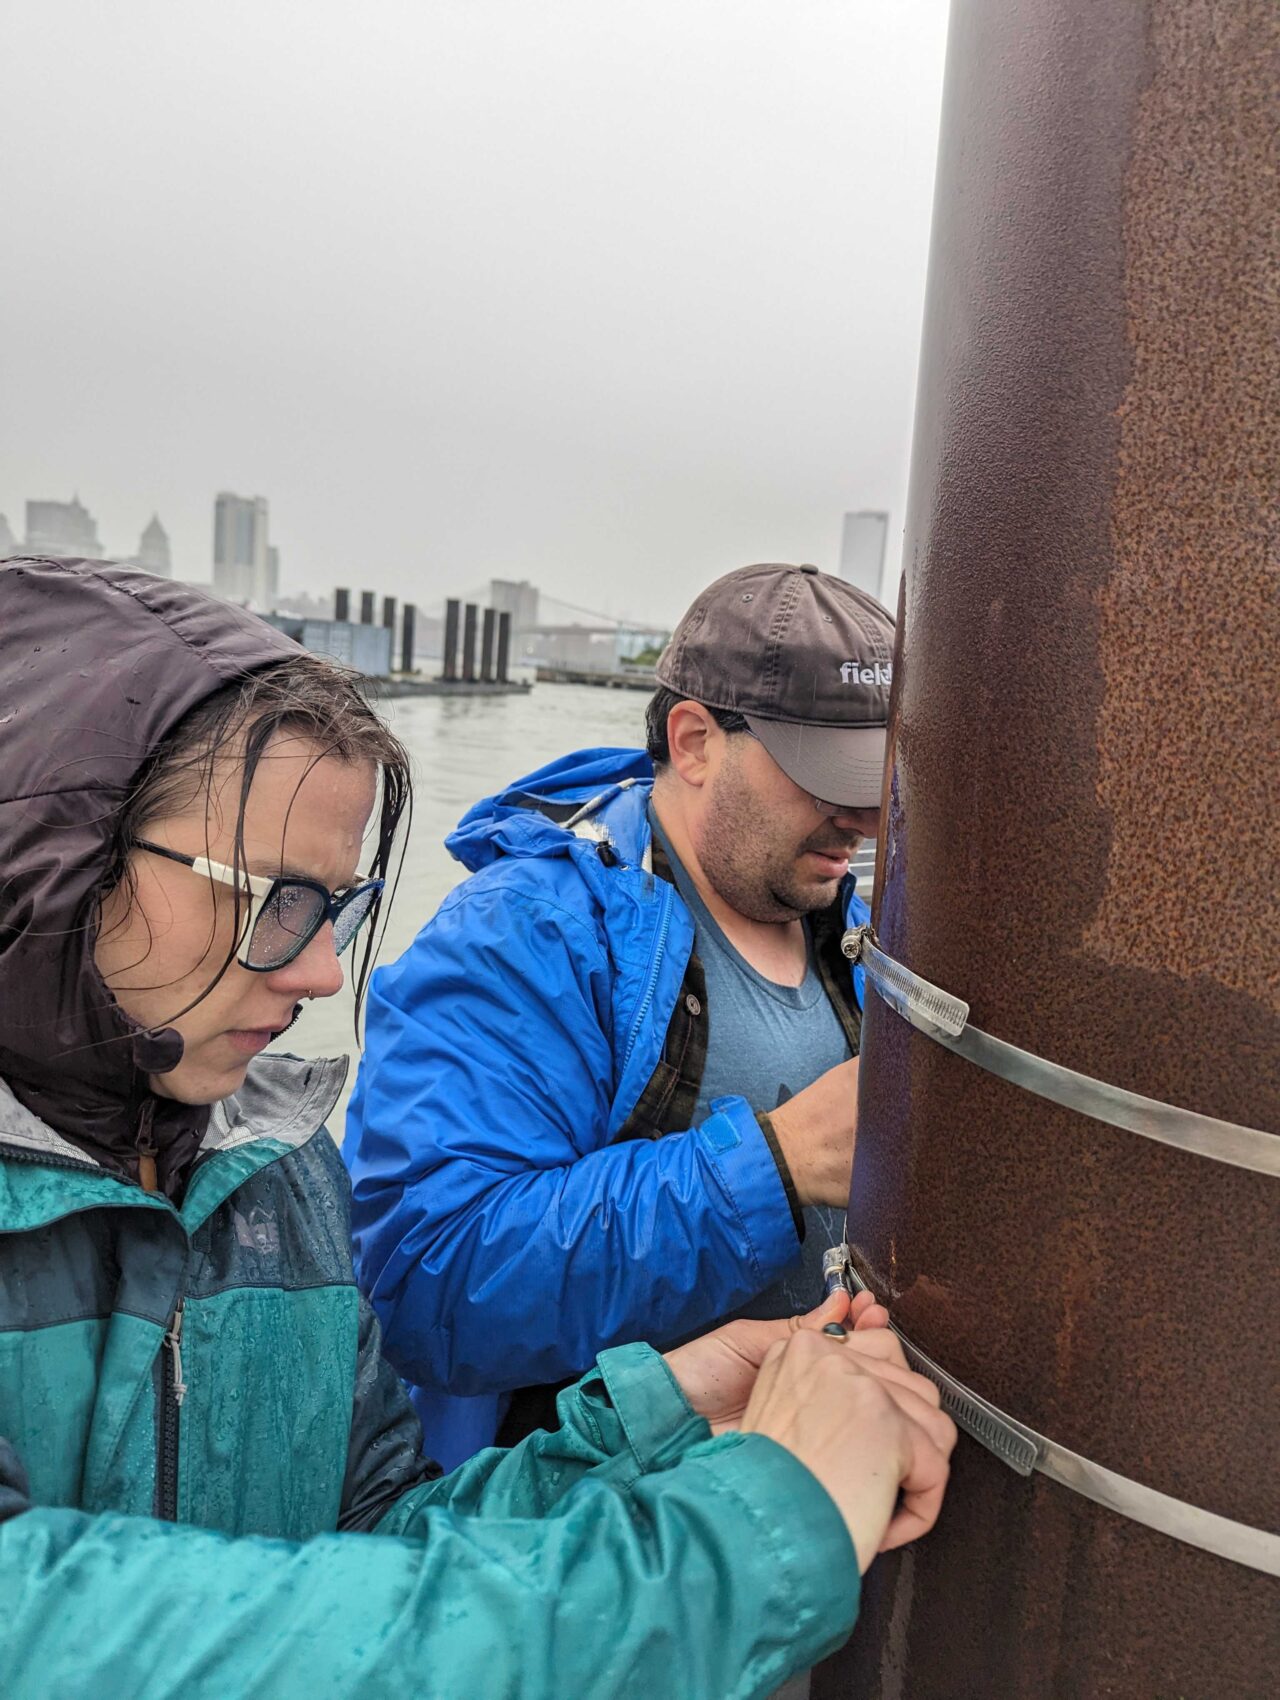
#8: Prepare for bad weather.
As you can see in the above image, about three hours into our deployment, the light drizzle of rain turned into a soaking; our team had raincoats but those only do so much. Wear wool socks and water-resistant trousers (or at least something other than cotton. Hats and hoods help too.
As it turns out, it would get much worse. The next day, New York experienced record flooding (which you can see on the NYC FloodNet portal here and elsewhere on September 29th, 2023), a reminder of the importance of environmental monitoring projects like this in the months and years to come.
In Conclusion
The truth is: deploying this kind of technology is tough. It’s rigorous work that requires skill, planning, and on-the-ground problem solving. Even with our experienced team, we ran into pitfalls. But we can also say that you’ll never have to deploy your FieldKit completely alone. Our team is dedicated not only to producing resources to support you through the process, but in nurturing and growing a network of users and enthusiasts who can support one another as we grow our community of environmental care.
Stay tuned for blog posts outlining the nuts-and-bolts process of our Brooklyn station deployment and become part of our community forum where you can ask questions and learn about everything FieldKit.